AVMS
AVMS is a comprehensive Access Control and Visitor Management System for condos, offices, and secure facilities, combining visitor, vehicle, and facility management in one seamless platform across web and mobile.
Overview
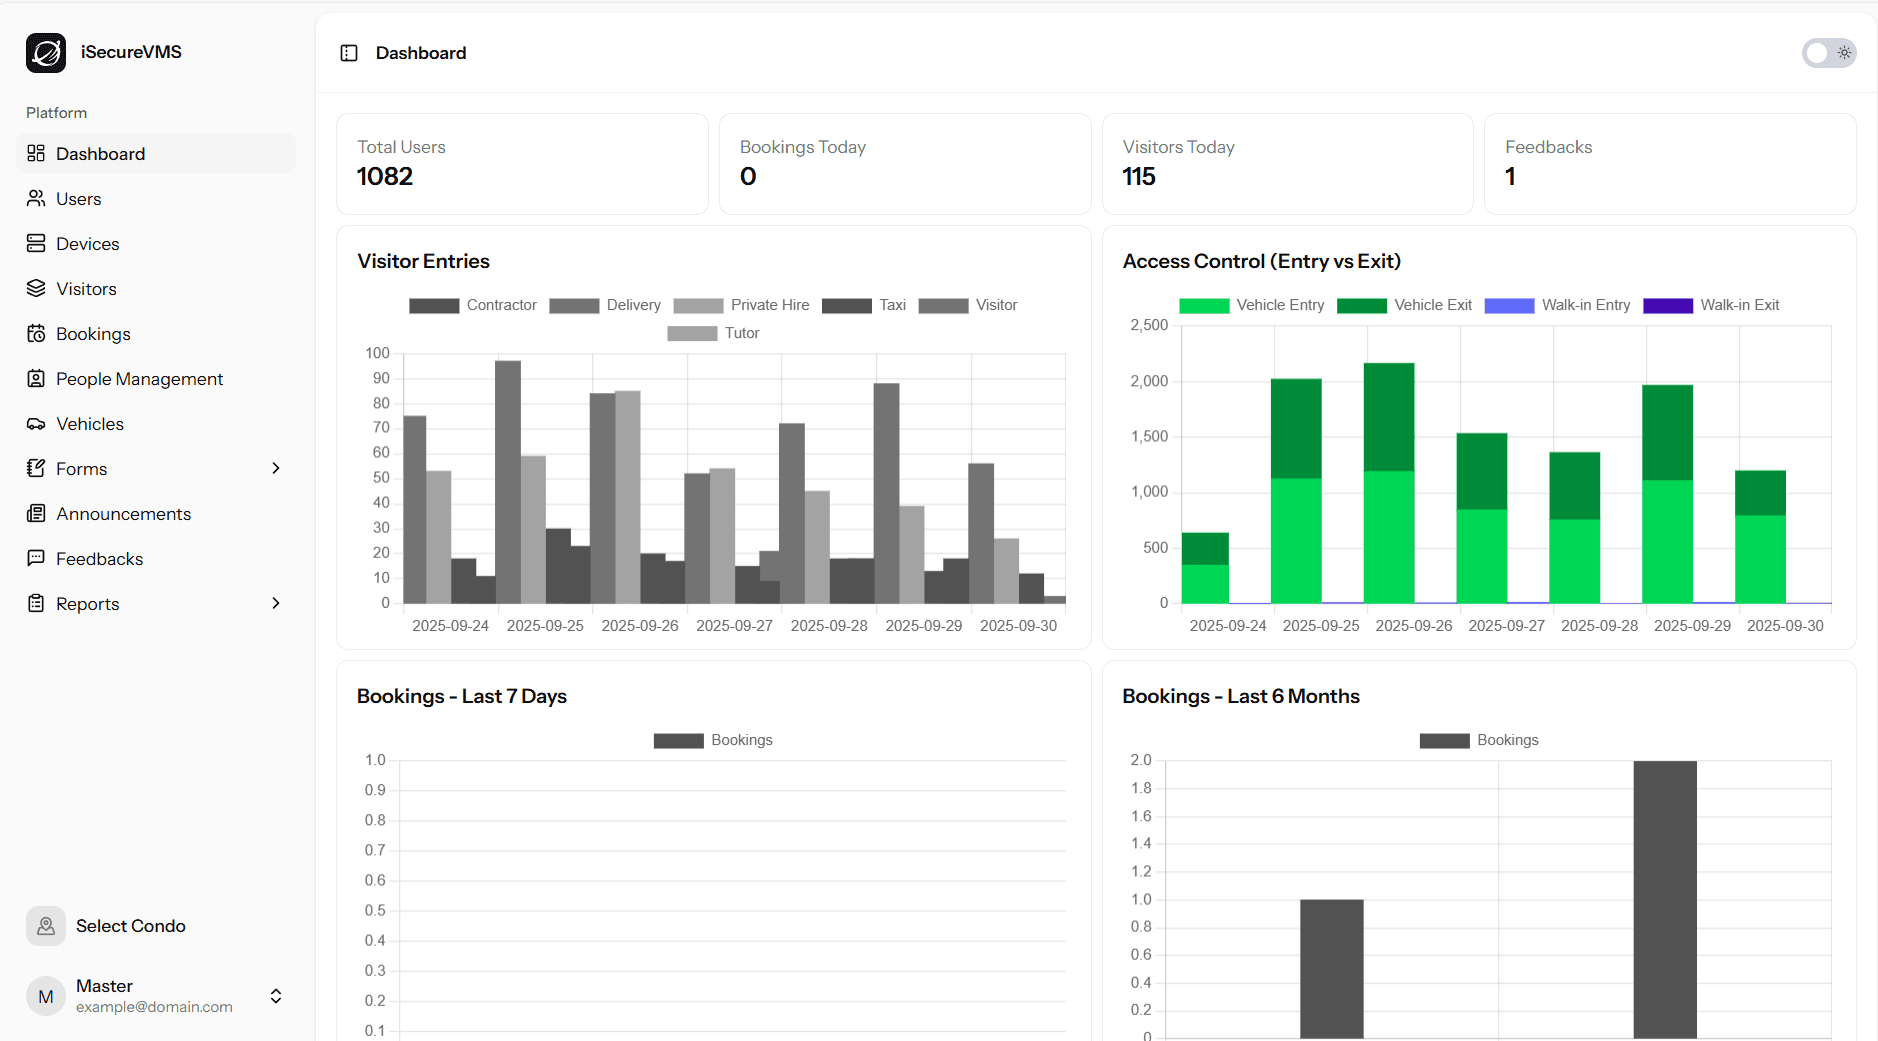
AVMS is an integrated platform designed for residential condos, offices, and high-security facilities. It goes beyond visitor management by offering modules for Vehicle Registration, Access Control, Facility Booking, Feedback, and E-Forms. The system streamlines daily operations with digital pre-registration, QR-based check-in/out, license plate recognition (LPR) for vehicles, and real-time notifications. Residents and administrators benefit from a unified web and mobile solution powered by React.js, Flutter, and MySQL. With a secure multi-tenant architecture, each property enjoys isolated data security while sharing a single, maintainable codebase.
Key Achievements
- Deployed across 20+ condominium and corporate facilities with thousands of monthly visitor and vehicle check-ins
- Reduced lobby and gate congestion by 50% with QR-based and LPR-based fast access
- Automated notifications (email, SMS, and push), improving communication with residents and visitors
- Enhanced compliance and audit readiness with digital visitor logs, vehicle access history, and facility booking reports
- Enabled residents to seamlessly book facilities, submit feedback, and complete e-forms through mobile apps
- Strengthened security with centralized Access Control Module integrating with turnstiles, barriers, and ANPR cameras
iSecure360-AVMS
About iSecure360-AVMS
Access Control & Vehicle Management System is a powerful and user-friendly solution designed to manage and monitor access control and vehicle movements in real-time. Ideal for residential communities, office premises, industrial zones, and other secured locations, this app ensures seamless security operations and efficient visitor handling.
Availble on both mobile and web based system.
Key Features
Server Requirements
The Laravel framework has a few system requirements. You should ensure that your web server has the following minimum PHP version and extensions:
Additionally, I want to add the zip and unzip extensions Composer will use when downloading my dependencies, and the MySQL PHP extension since that’s the database type I’m using in my application.
I can accomplish this using apt, a command line utility for managing packages on Linux systems.
First - I’ll specify a new repository apt can download software packages from. The repository we’re adding is ppa:ondrej/php, the primary source for PHP-related packages.
sudo add-apt-repository ppa:ondrej/php

sudo apt update
Finally, we can get the necessary extensions. In my case, the command to do that looks like the following.
sudo apt install php-fpm php-mysql php-mbstring unzip php-json php-bcmath php-zip php-gd php-tokenizer php-xml
Get dependencies
Next, we need to pull in the application’s Composer dependencies (i.e. our vendor/ directory).
If working on a production server, use the following command so any development-specific dependencies are excluded and the version number of your dependencies match whatever was used in development and written to composer.lock:
composer install --optimize-autoloader --no-dev

composer update
Build .env file
Every Laravel application needs a .env file with environment-specific configurations. Because the contents of this file are going to differ from environment to environment, it is not tracked as part of your version control repository (it’s ignored via the .gitignore config file) and therefor you have to manually create it whenever setting up the application in a new environment.
To do this, you can copy the provided .env.example file and update to as appropriate:
cp .env.example .env
Run the following command to generate the APP_KEY value within your .env file:
php artisan key:generate
Set permissions
There are two directories within a Laravel application that need to be writable by the server: storage and bootstrap/cache. Within these directories, the server will write application-specific files such as cache info, session data, error logs, etc.
To allow this to happen, you need to update the permissions of storage and bootstrap/cache so they are owned by the system user your web server is running as.
Run the following command to see which user your Nginx web server runs as:
chown -R www-data:www-data .

chown -R www-data storage
chown -R www-data bootstrap/cache

chmod -R 775 storage
chmod -R 775 storage/*
Server Configuration (Nginx) on Ubuntu Server
At this point, everything is set up within our application, we just need to configure our server to run it.
Within /etc/nginx/sites-available/ create a new file with the following content (ref: Nginx deployment guide on offical website). You can call the file whatever you want; I’ll name mine demo after the name of the app.
Within the content update the following:
    server {
        listen 80;
        listen [::]:80;
        server_name example.com;
        root /srv/example.com/public;

        access_log /var/log/nginx/example.com.access.log;
        error_log /var/log/nginx/example.com.error.log;

        add_header X-Frame-Options "SAMEORIGIN";
        add_header X-XSS-Protection "1; mode=block";
        add_header X-Content-Type-Options "nosniff";

        index index.php;

        charset utf-8;

        location / {
            try_files $uri $uri/ /index.php?$query_string;
        }

        location /build/ {
                alias /srv/example.com/public/build/;
                try_files $uri $uri/ /index.php?$query_string;
        }

        location = /favicon.ico { access_log off; log_not_found off; }
        location = /robots.txt  { access_log off; log_not_found off; }

        error_page 404 /index.php;

        location ~ .php$ {
            fastcgi_pass unix:/var/run/php/php8.2-fpm.sock;
            fastcgi_index index.php;
            fastcgi_param SCRIPT_FILENAME $realpath_root$fastcgi_script_name;
            include fastcgi_params;
            fastcgi_read_timeout 300;
            fastcgi_buffers 16 16k;    # Increase buffer count and size
            fastcgi_buffer_size 32k;   # Increase initial buffer size
        }

        location ~ /.(?!well-known).* {
            deny all;
        }
    }
Next, to enable this config we need to symbolically link the file to the /etc/nginx/sites-enabled directory.
To do this, run the following command, replacing demo with the name of the file you created:
sudo ln -s /etc/nginx/sites-available/demo /etc/nginx/sites-enabled

sudo nginx -t
Expected output:
nginx: the configuration file /etc/nginx/nginx.conf syntax is ok
nginx: configuration file /etc/nginx/nginx.conf test is successful
If all looks good, restart Nginx to make the changes take effect:
systemctl restart nginx
To Install Certbot
sudo apt install python3-certbot-nginx

sudo certbot --nginx -d yourdomain.com -d www.yourdomain.com
After you execute this command there will be a couple of entries that you will need to fill, such as the email address, agreement about the terms and conditions, if you want to share your email adress or not, and the redirect options.
root@vps:~# sudo certbot --nginx -d yourdomain.com -d www.yourdomain.com
Saving debug log to /var/log/letsencrypt/letsencrypt.log
Plugins selected: Authenticator nginx, Installer nginx
Enter email address (used for urgent renewal and security notices) (Enter 'c' to
cancel): admin@yourdomain.com

- - - - - - - - - - - - - - - - - - - - - - - - - - - - - - - - - - - - - - - -
Please read the Terms of Service at
https://letsencrypt.org/documents/LE-SA-v1.2-November-15-2017.pdf. You must
agree in order to register with the ACME server at
https://acme-v02.api.letsencrypt.org/directory
- - - - - - - - - - - - - - - - - - - - - - - - - - - - - - - - - - - - - - - -
(Y)yes/(N)no: Y

- - - - - - - - - - - - - - - - - - - - - - - - - - - - - - - - - - - - - - - -
Would you be willing to share your email address with the Electronic Frontier
Foundation, a founding partner of the Let's Encrypt project and the non-profit
organization that develops Certbot? We'd like to send you email about our work
encrypting the web, EFF news, campaigns, and ways to support digital freedom.
- - - - - - - - - - - - - - - - - - - - - - - - - - - - - - - - - - - - - - - -
(Y)es/(N)o: N
Obtaining a new certificate
Performing the following challenges:
http-01 challenge for yourdomain.com
http-01 challenge for www.yourdomain.com
Waiting for verification...
Cleaning up challenges
Deploying Certificate to VirtualHost /etc/nginx/sites-available/yourdomain.com
If everything is set up as should be the certificate will be installed and you will receive the message below.
Congratulations! You have successfully enabled https://yourdomain.com and https://www.yourdomain.com

You should test your configuration at:
https://www.ssllabs.com/ssltest/analyze.html?d=yourdomain.com
https://www.ssllabs.com/ssltest/analyze.html?d=www.yourdomain.com
- - - - - - - - - - - - - - - - - - - - - - - - - - - - - - - - - - - - - - - -

IMPORTANT NOTES:
 - Congratulations! Your certificate and chain have been saved at:
   /etc/letsencrypt/live/yourdomain.com/fullchain.pem
   Your key file has been saved at:
   /etc/letsencrypt/live/yourdomain.com/privkey.pem
   Your cert will expire on 2022-05-07. To obtain a new or tweaked
   version of this certificate in the future, simply run certbot again
   with the "certonly" option. To non-interactively renew *all* of
   your certificates, run "certbot renew"
 - Your account credentials have been saved in your Certbot
   configuration directory at /etc/letsencrypt. You should make a
   secure backup of this folder now. This configuration directory will
   also contain certificates and private keys obtained by Certbot so
   making regular backups of this folder is ideal.
 - If you like Certbot, please consider supporting our work by:

   Donating to ISRG / Let's Encrypt:   https://letsencrypt.org/donate
   Donating to EFF:                    https://eff.org/donate-le
MySql Mariadb Database Configuration
To install mariaDB, first run the following command to update the package index on your server:
sudo apt update
Then, run the following command to install:
sudo apt install mariadb-server
you can start the database service by run the following command:
systemctl start mysql
To secure your installation, after installation, it's suggested you secure your installation with the following command:
sudo mysql_secure_installation
Here are a summary of responses for each prompt it presents you with:
New User in Mysql database
Run the following command to create new user for mysql database:
sudo mysql -u root

CREATE USER 'your-username-here'@'localhost' IDENTIFIED BY 'your-password-here';
Next, we need to grant the username privileges to manage the database:
GRANT ALL PRIVILEGES ON your-database-name-here . * TO 'your-username-here'@'localhost';
To Support QR Code, please follow below instructions
Install Browsershot: Install spatie/browsershot to convert HTML to an image:
composer require spatie/browsershot
Install Puppeteer (Node.js dependency):
sudo -u www-data npm install puppeteer
Install Chrome or chrome-headless-shell:
sudo -u www-data npx puppeteer browsers install chrome-headless-shell
This will download and install chrome-headless-shell to the default Puppeteer cache directory (/var/www/.cache/puppeteer). Ensure the user running the PHP process (e.g., www-data for Apache/Nginx) has write permissions to this directory:
sudo mkdir -p /var/www/.cache/puppeteer
sudo chown -R www-data:www-data /var/www/.cache/puppeteer
sudo chmod -R 775 /var/www/.cache/puppeteer
Verify the installation:
ls -l /var/www/.cache/puppeteer/chrome-headless-shell
You should see a directory like linux-138.0.7204.168 containing chrome-headless-shell. If it’s still missing, check for errors during the npx command output (e.g., network issues, permissions).
For Running Laravel commands automatically
Open terminal and enter below command
crontab -e
Once crontab file opened, enter below command
* * * * * cd /path/to/your/Laravel/app && php artisan schedule:run >> /dev/null 2>&1
For Running Laravel Queue automatically
Open terminal and enter below command
sudo nano /etc/supervisor/conf.d/laravel-worker.conf
Paste the following content (update paths accordingly):
[program:laravel-worker]
process_name=%(program_name)s_%(process_num)02d
command=php /var/www/project_folder/artisan queue:work database --sleep=3 --tries=3 --timeout=90
autostart=true
autorestart=true
user=kumar
numprocs=1
redirect_stderr=true
stdout_logfile=/var/www/project_folder/storage/logs/laravel-queue.log
stopwaitsecs=3600
Important:
Reload Supervisor
sudo supervisorctl reread
sudo supervisorctl update
Start the Laravel queue worker
sudo supervisorctl start laravel-worker:*
To check status:
sudo supervisorctl status
To reload:
sudo supervisorctl restart laravel-worker:*